Halloween Make Up ♥ Make Up For Ever School
| 30 Ottobre 2012 | 1 comment |
|
Tweet |

© non solo Kawaii - Make Up For Ever - Make Up School
Model: Loretta, Angela Chiappa, Anjeza | Photo Laura Castellanza

© non solo Kawaii - Make Up For Ever - Make Up School | Model Angela Chiappa | Photo Laura Castellanza
Quante volte guardando i film dell’orrore ci siamo chiesti come si realizzassero tagli, bruciature, tumefazioni e dita mozzate talmente perfetti da sembrare veri?
Il 9 ottobre siamo state alla Make Up School di Make Up For Ever e la make up artist Ilaria ci ha svelato i trucchi del mestiere e gli strumenti necessari per diventare un vero zombie.
In the horror movies we watched many times cuts, burns, swelling and severed fingers so perfect as to seem real.
On October the 9th, we attended Make Up For Ever School, our teacher was the make up artist Ilaria who told us the tricks and the tolls to become a zombie.

© non solo Kawaii - Make Up For Ever - Make Up School | Model: Camille | Photo Angela Chiappa

© non solo Kawaii - Make Up For Ever - Make Up School | Photo Angela Chiappa
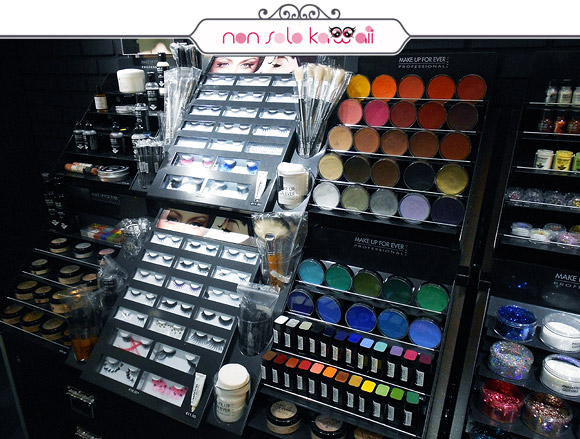
I prodotti fondamentali per realizzare un perfetto make up per Halloween fanno parte della linea PRO Special Effects di Make Up For Ever:
♥ Liquid Artificial Blood
Sangue artificiale liquido che sembra sangue umano.
Si utilizza per simulare emorragie e può essere applicato direttamente sulla pelle e vicino a bocca, naso e occhi. Per esempio: ferite che sanguinano e occhi che piangono sangue.
♥ Coagulated Artificial Blood
Sangue artificiale coagulato che sembra sangue umano grumoso.
Si utilizza per simulare l’aspetto di sangue coagulato o croste di ferite.
♥ Liquid Latex
Lattice liquido che forma pellicola che assomiglia alla pelle.
Si utilizza per creare ferite, rughe ed effetti 3d e non può essere applicato vicino agli occhi. Per esempio: tagli, scottature e lembi di pelle strappata.
♥ Blister Effect Gel
Gel Effetto Blister è un gel trasparente.
Si può utilizzare per simulare le irregolarità della pelle come vesciche e ustioni.
The key products to create a perfect makeup for Halloween are part of the PRO Special Effects line by Make Up For Ever:
♥ Liquid Artificial Blood
It simulates bleeding and it can be applied directly to the skin and close to the mouth, nose and eyes. For example: bleeding wounds and eyes that cry blood.
♥ Artificial Coagulated Blood
It simulates coagulated blood or scabs.
♥ Liquid Latex
It creates a layer that seems skin.
It can be used to create wounds, wrinkles and 3D effects and it can not be applied in the area around the eyes. For example: cuts, burns and ripped skin.
♥ Blister Gel Effect
Blister Gel Effect is a clear gel.
It can be applied to simulate skin irregularities like blisters and burns.

© non solo Kawaii - Make Up For Ever - Make Up School | Photo Angela Chiappa

© non solo Kawaii - Make Up For Ever - Make Up School | Photo Angela Chiappa

© non solo Kawaii - Make Up For Ever - Make Up School | Photo Angela Chiappa

© non solo Kawaii - Make Up For Ever - Make Up School | Photo Angela Chiappa
Con questi prodotti e un po’ di fantasia potrete realizzare trucchi che faranno terrorizzare tutti i vostri amici ad Halloween.
A seguire alcune ispirazioni e brevi tutorial da mettere in pratica nella notte delle streghe.
With these products and a bit of fantasy, you can realize a makeup that can terrify your friends on Halloween.
Here are some inspirations and brief tutorials for the witch’s night.
Potete orientarvi nell’articolo con i link interni! Buona lettura.
You can surf in the article through the internal links! Enjoy the read.
♥ Tutorial - Ferita / Wound
♥ Tutorial - Scottatura / Burn
♥ Camille The Zombie Lady
♥ Angela The Broken Doll

© non solo Kawaii - Make Up For Ever - Make Up School | Angela Chiappa & Camille | Photo Laura Castellanza

© non solo Kawaii - Make Up For Ever - Make Up School | Photo Angela Chiappa

© non solo Kawaii - Make Up For Ever - Make Up School | Photo Angela Chiappa

© non solo Kawaii - Make Up For Ever - Make Up School | Photo Angela Chiappa
1 ♥ Fazzoletto di carta
Creare la forma della ferita strappando dei pezzi di fazzoletto dalla forma irregolare e posizionandoli nel punto desiderato.
2 ♥ Liquid Latex
Applicare il latex con una spugnetta (che poi sarà gettata via), ricoprendo l’area del fazzoletto.
3 ♥ Super Matte Loose Powder
Picchiettare la cipria.
4 ♥ Fondotinta e correttore
Applicare fondotinta e correttore nel lato esterno della ferita sfumandoli verso l’esterno in modo da omogeneizzare il colore con quello della propria pelle.
5 ♥ Palette 12 Flash Color Case
Con un pennellino sfumare il rosso a partire dalla bordo interno della ferita.
Ripassare il contorno della ferita con il colore nero, applicare il marrone verso il centro e infine colorare l’interno rosso.
Con l’aiuto di un polpastrello tamponare il rosso intorno alla ferita.
6 ♥ Coagulated Artificial Blood
7 ♥ Liquid Artificial Blood
Riempiere di sangue artificiale liquido, fino a farlo colare verso l’esterno.
1 ♥ Tissue
Create the shape of the wound tearing pieces of tissue, the shape should be irregular, then choose the place where to apply it.
2 ♥ Liquid Latex
Apply the latex with a sponge (that will be thrown away), covering the tissue area.
3 ♥ Super Matte Loose Powder
Tap the powder.
4 ♥ Foundation and concealer
Apply foundation and concealer on the borders of the wound, blend them outwards, so that the wound will get the same color of your skin.
5 ♥ Palette 12 Flash Color Case
Blend the red from the inner border of the wound with a brush.
Outline the inner border with the black, apply the brown toward the center and the red in the center.
Tap the red around the wound with a fingertip.
6 ♥ Coagulated Artificial Blood
7 ♥ Liquid Artificial Blood
Apply the liquid artificial blood, until blood pours down.

© non solo Kawaii - Make Up For Ever - Make Up School | Photo Angela Chiappa

© non solo Kawaii - Make Up For Ever - Make Up School | Photo Angela Chiappa

© non solo Kawaii - Make Up For Ever - Make Up School | Photo Angela Chiappa

© non solo Kawaii - Make Up For Ever - Make Up School | Photo Angela Chiappa
1 ♥ Blister Effect Gel + Coagulated Artificial Blood
Mischiare il gel con il sangue finto coagulato e picchiettare con i polpastrelli il prodotto.
2 ♥ Ombretto nero
Applicare il colore nero in alcune parti della “scottatura” per dare un effetto bruciato.
1 ♥ Blister Effect Gel + Coagulated Artificial Blood
Mix the gel with coagulated artificial blood and tap the product using the fingertips.
2 ♥ Black eyeshadow
Apply the black color in some areas to give a burnt effect.

© non solo Kawaii - Make Up For Ever - Make Up School | Photo Angela Chiappa

© non solo Kawaii - Make Up For Ever - Make Up School | Photo Angela Chiappa

© non solo Kawaii - Make Up For Ever - Make Up School | Photo Angela Chiappa
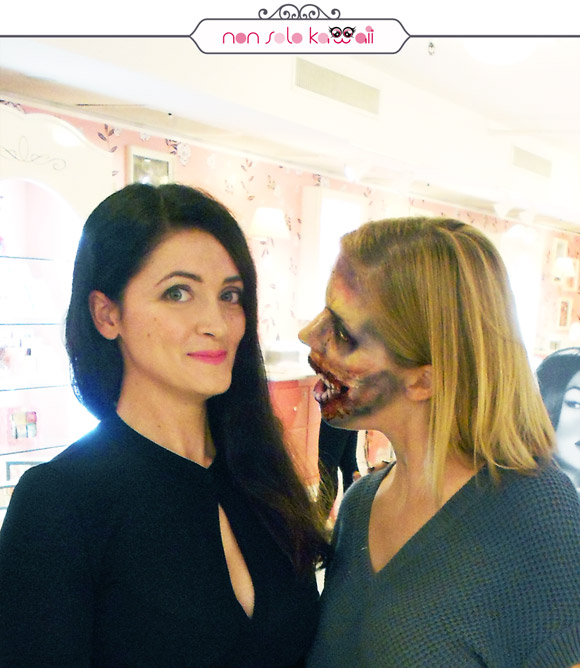
Due facce: una stupenda e ammaliante, l’altra proviene direttamente dall’oltretomba!
Il procedimento per realizzare questo makeup è simile a quello della ferita, ma naturalmente il disegno dei denti e dell’incarnato effetto zombie rende tutto più complicato!
Two faces: one is beautiful and fascinating, the other comes directly from the afterworld!
The process of this makeup is similar to the wound tutorial, but of course the drawing of the teeth and the zombie complexion effect make everything more complicated!

© non solo Kawaii - Make Up For Ever - Make Up School | Model: Camille | Photo Angela Chiappa

© non solo Kawaii - Make Up For Ever - Make Up School | Model: Camille | Photo Angela Chiappa

© non solo Kawaii - Make Up For Ever - Make Up School | Model: Camille | Photo Angela Chiappa

© non solo Kawaii - Make Up For Ever - Make Up School | Model: Camille | Photo Angela Chiappa

© non solo Kawaii - Make Up For Ever - Make Up School | Model: Camille | Photo Angela Chiappa

© non solo Kawaii - Make Up For Ever - Make Up School | Model: Camille | Photo Angela Chiappa
Una bambola assassina, ma kawaii, con pelle di porcellana, occhi fucsia e bocca a cuore.
Piange glitter perchè si è rotta.
A killer kawaii doll, with porcelain skin, pink eyes and heart-shaped mouth.
She cries glitters because she is broken.

© non solo Kawaii - Make Up For Ever - Make Up School | Model Angela Chiappa | Photo Laura Castellanza

© non solo Kawaii - Make Up For Ever - Make Up School | Model Angela Chiappa | Photo Laura Castellanza

© non solo Kawaii - Make Up For Ever - Make Up School | Model Angela Chiappa | Photo Laura Castellanza

© non solo Kawaii - Make Up For Ever - Make Up School | Model Angela Chiappa | Photo Laura Castellanza

© non solo Kawaii - Make Up For Ever - Make Up School | Model Angela Chiappa | Photo Laura Castellanza

© non solo Kawaii - Make Up For Ever - Make Up School | Model Angela Chiappa | Photo Laura Castellanza
Prodotti utilizzati / We applied:
♥ Liquid Latex
♥ Clown White
♥ Super Matte Loose Powder
♥ Pink & Purple Eyeshadow
♥ Pink - 12 Flash Color Case
♥ Black - 12 Flash Color Case

© non solo Kawaii - Make Up For Ever - Make Up School | Photo Angela Chiappa

© non solo Kawaii - Make Up For Ever - Make Up School | Photo Angela Chiappa

© non solo Kawaii - Make Up For Ever - Make Up School | Photo Angela Chiappa

© non solo Kawaii - Make Up For Ever - Make Up School | Photo Angela Chiappa
Questo è solo uno degli workshop organizzati da Make Up For Ever a cui possono partecipare i possessori della Pro Card.
La make up school si tiene presso Sephora Milano, in Corso Vittorio Emanuele II.
This is just one of the workshops organized by Make Up For Ever where can attend Pro Card holders
The make-up school is held at Sephora in Milan, in Corso Vittorio Emanuele II.

© non solo Kawaii - Make Up For Ever - Make Up School | Photo Angela Chiappa

© non solo Kawaii - Make Up For Ever - Make Up School | Photo Angela Chiappa

© non solo Kawaii - Make Up For Ever - Make Up School | Photo Angela Chiappa

© non solo Kawaii - Make Up For Ever - Make Up School | Photo Angela Chiappa
Link:
| Angela & Laura |
Similar Posts:
- Be Chic Make Up Collection 2012
- Halloween 2015: Nail Art Ideas with Grazia.it
- B by Limoni Make Up Academy ♥ Milano Fashion Week
- Pupa Make up Session: Be Exaggerated, Be Vamp!
- Make-up School with Givenchy and Desirée in Milan

|
Tags: Kawaii Makeup, makeup, trendy Milano |


Il trucco di Camille è impressionante! Da perfetto zombie di The Walking Dead!! Chissà che impressione per lei vedersi così >__<
Bellissime tutte! Anzi spaventosissime ^__<
Commenta! ♥ Comment!